How to Configure and Manage Let’s Encrypt in cPanel
Encrypt in cPanel
Let’s Encrypt in cPanel is a free, automated, and open certificate authority that provides SSL/TLS certificates to encrypt websites and enhance their security. If you’re using cPanel, configuring and managing Let’s Encrypt is straightforward. Below is a step-by-step guide to help you install and manage Let’s Encrypt SSL certificates in cPanel.
Table of Contents
Step 1: Access Your cPanel Account
- Log in to cPanel: Encrypt in cPanel Use your username and password to log in to your cPanel dashboard.
- Locate the SSL/TLS Section: In the cPanel dashboard, find the “Security” section and click on “SSL/TLS”.

Step 2: Install the Let’s Encrypt Plugin (if not already installed)
If Let’s Encrypt is not yet enabled on your hosting server, you may need to ask your hosting provider to enable the Let’s Encrypt plugin for cPanel. Most modern cPanel installations already have this installed.
- Look for Let’s Encrypt in the Security Section: If your cPanel has the Let’s Encrypt plugin installed, you will see an icon labeled “Let’s Encrypt™ SSL”.
- If it’s not available, contact your hosting provider and ask them to install or enable the Let’s Encrypt plugin for cPanel.

Step 3: Installing Let’s Encrypt SSL Certificate
- Navigate to Let’s Encrypt SSL: Click on the “Let’s Encrypt™ SSL” icon in the Security section of cPanel.
- Select the Domain: You will be presented with a list of domains hosted under your account. Choose the domain or subdomain you wish to install the SSL certificate for.
- Install the Certificate:
- Click on the “Issue” button next to the domain.
- In the options that appear, you can choose whether you want SSL for the main domain or include www and mail.yourdomain.com as well.
- Click “Issue” to start the installation.
- Success Message: Once the SSL certificate is installed, cPanel will display a confirmation message.
Step 4: Verify SSL Installation
To verify that the Let’s Encrypt SSL certificate is properly installed:
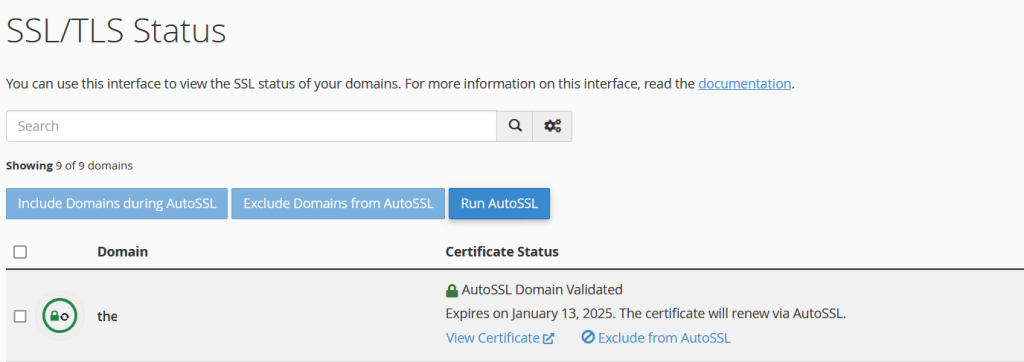
- Navigate to the SSL/TLS Section in cPanel.
- Manage SSL Certificates: Click on “Manage SSL sites” to see the status of your SSL installation.
- Alternatively, visit your website using https:// to ensure that it is secured with the Let’s Encrypt certificate.
Step 5: Auto-Renewal of Let’s Encrypt SSL
Encrypt in cPanel certificates are valid for 90 days, but they can be automatically renewed by cPanel. To ensure auto-renewal is active:
- Go to the “Let’s Encrypt SSL” section in cPanel.
- Ensure that the option for auto-renew is enabled. If it is not, contact your hosting provider for support.
Step 6: Managing SSL Certificates in cPanel
To manage your installed SSL certificates:
- View Installed Certificates: Go to “SSL/TLS” in cPanel and click on “Manage SSL Sites” to see all SSL certificates, including those installed using Let’s Encrypt.
- Reinstall, Update, or Revoke: From this section, you can reinstall, update, or remove the Let’s Encrypt SSL certificates from any domain as needed.
Step 7: Force HTTPS on Your Website
Once Let’s Encrypt is installed, it’s recommended to force all traffic to use HTTPS.
- Redirect to HTTPS: To do this, you can add a redirect in your .htaccess file.bashCopy code
RewriteEngine On RewriteCond %{SERVER_PORT} 80 RewriteRule ^(.*)$ https://yourdomain.com/$1 [R,L] - This rule will ensure that all traffic to your website is redirected to the secure HTTPS version.
Conclusion
Setting up and managing Let’s Encrypt SSL certificates in cPanel is a straightforward process that helps secure your website with HTTPS for free. With automatic renewals and easy management, Let’s Encrypt provides a simple yet essential layer of security for your site’s visitors.
